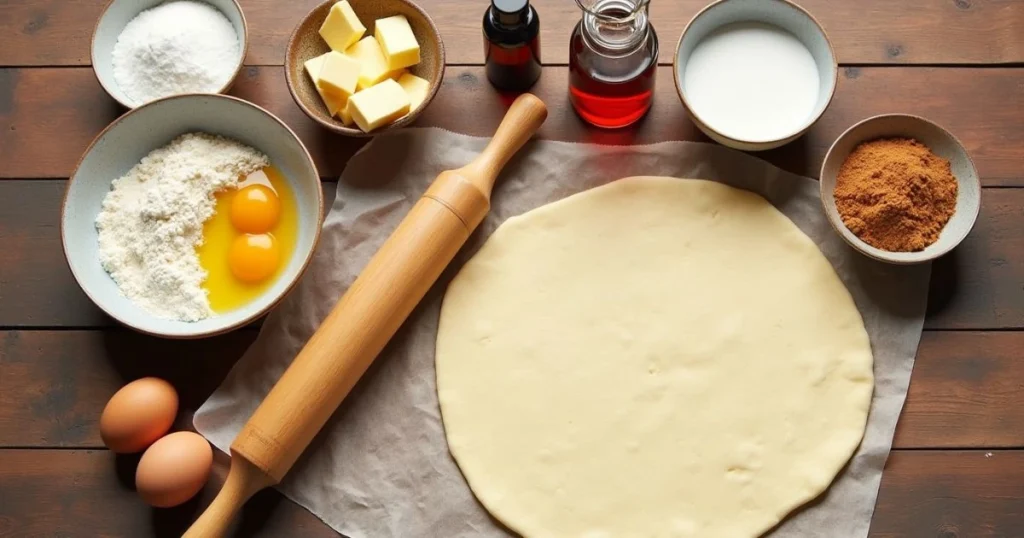
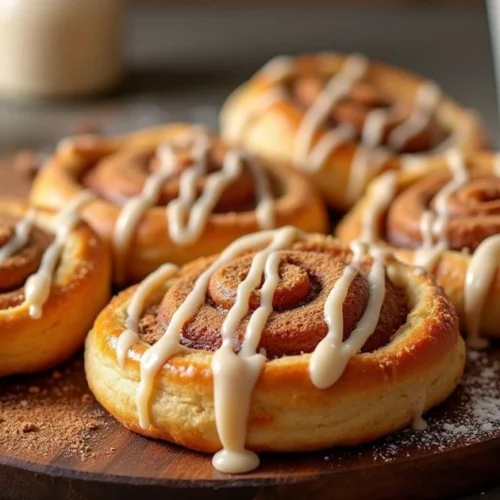
Is there anything more comforting than the warm aroma of cinnamon wafting through your kitchen? This cinnamon Danish recipe combines flaky, buttery pastry with a sweet, spiced filling that melts in your mouth. Perfect for breakfast, brunch, or an afternoon treat, it’s the ultimate way to elevate any moment into something special.
What makes this recipe truly exceptional is its versatility—you can enjoy it as-is, or get creative by adding your favorite toppings or flavors. Whether you’re a seasoned baker or trying your hand at homemade pastries for the first time, this recipe is approachable, rewarding, and guaranteed to impress. Let’s dive in and bring a touch of bakery magic to your kitchen!
Table of Contents
Key Benefits of The Best Cinnamon Danish Recipe Ever
Cinnamon Danishes are the perfect treat when you’re looking for something sweet, flaky, and utterly irresistible. Here’s why this recipe stands out and deserves a place in your kitchen:
1. Perfect for Any Occasion
Whether you’re serving breakfast, hosting brunch, or simply indulging in a mid-afternoon snack, this cinnamon Danish is a guaranteed crowd-pleaser. Its versatility makes it a hit for casual mornings and elegant gatherings alike.
2. Homemade Goodness with Bakery-Quality Results
Why head to a bakery when you can make buttery, flaky pastries in the comfort of your own home? This recipe gives you all the satisfaction of a professional Danish with easy-to-follow steps, even for beginners.
3. Bursting with Flavor
The combination of sweet cinnamon sugar and the tender layers of pastry creates a perfect balance of flavors. Add a drizzle of cream cheese glaze, and each bite becomes an unforgettable experience.
4. Customizable to Your Taste
This recipe is your canvas—feel free to add raisins, chopped nuts, or even a touch of fruit preserves to make it your own. The options are endless, so you can create the perfect Danish for your preferences.
5. Simple Yet Impressive
With this recipe, you’ll master the art of creating pastries that look as good as they taste. Whether you’re treating yourself or wowing your guests, this cinnamon Danish will make you feel like a pro.
Final Thoughts on the Benefits
From its incredible flavor to its ease of preparation, this cinnamon Danish recipe is everything you need to elevate your baking game. It’s time to roll up your sleeves and start creating something truly special!
Ingredients for The Best Cinnamon Danish Recipe Ever
Making this delicious cinnamon Danish is easier than you might think, especially with the right ingredients on hand. Here’s everything you’ll need to create the perfect pastry:
For the Dough
- 2 ¾ cups all-purpose flour – The foundation for a soft yet sturdy dough.
- 2 ¼ teaspoons (1 packet) instant yeast – Helps the dough rise and creates a light, airy texture.
- ¼ cup granulated sugar – Adds a subtle sweetness to the dough.
- ½ teaspoon salt – Balances the flavors.
- ¾ cup warm milk – Activates the yeast and gives the dough its tender consistency.
- 1 large egg – Provides richness and structure.
- ½ cup unsalted butter, softened – Adds the buttery flavor essential for Danish pastry.
For the Cinnamon Filling
- ½ cup unsalted butter, softened – Makes the filling creamy and easy to spread.
- ⅔ cup brown sugar – Adds a caramel-like sweetness to the filling.
- 1 ½ tablespoons ground cinnamon – The star of the show, giving the filling its warm, spiced flavor.
- 1 teaspoon vanilla extract – Enhances the depth of flavor.

For the Cream Cheese Glaze (Optional but Recommended!)
- 4 oz cream cheese, softened – The perfect creamy base for the glaze.
- 1 cup powdered sugar – Adds sweetness and smoothness to the glaze.
- 2–3 tablespoons milk – Adjusts the consistency for easy drizzling.
- ½ teaspoon vanilla extract – Adds a subtle hint of flavor to the glaze.
Ingredient Tips
- Use Fresh Ingredients: Fresh yeast and high-quality cinnamon make a big difference in the final flavor.
- Room Temperature Ingredients: For the best results, let your butter, milk, and eggs come to room temperature before starting.
- Optional Add-Ins: If you’d like, you can add raisins, chopped nuts, or a sprinkling of orange zest to the filling for a creative twist.
With these ingredients prepped, you’re ready to dive into the fun part—putting everything together to create your own homemade cinnamon Danish masterpiece!
Step-by-Step Instructions for The Best Cinnamon Danish Recipe Ever
Making your own cinnamon Danish may sound challenging, but with this step-by-step guide, you’ll find it easier than you think. Let’s dive into the process and create a treat that’s flaky, buttery, and packed with sweet cinnamon goodness.
Step 1: Prepare the Dough
- In a large mixing bowl, combine warm milk (¾ cup), sugar (¼ cup), and instant yeast (2 ¼ teaspoons). Let it sit for 5 minutes until frothy.
- Add egg (1 large), softened butter (½ cup), salt (½ teaspoon), and flour (2 ¾ cups). Mix until a soft dough forms.
- Knead the dough on a lightly floured surface for 8–10 minutes until smooth and elastic.
- Place the dough in a greased bowl, cover, and let it rise in a warm spot for 1–1.5 hours, or until doubled in size.
Step 2: Make the Cinnamon Filling
- In a small bowl, mix softened butter (½ cup), brown sugar (⅔ cup), ground cinnamon (1 ½ tablespoons), and vanilla extract (1 teaspoon) until smooth.
- Set aside at room temperature so it’s easy to spread when assembling.
Step 3: Roll Out the Dough
- Once the dough has risen, punch it down gently and transfer it to a floured surface.
- Roll the dough into a rectangle about 12×16 inches, keeping the thickness even throughout.
Step 4: Spread the Filling and Shape
- Place cinnamon filling across the entire surface of the dough while keeping space free on all sides.
- Begin by rolling up the dough from one end to the other.
- Slice the log into 12 equal pieces using a sharp knife or dental floss for clean cuts.
Step 5: Shape and Proof the Danishes
- Arrange the slices on a greased or parchment-lined baking sheet, leaving space for them to expand.
- Press each piece a little to make it thinner. Cover with a clean towel and let them proof for 30–45 minutes, or until puffed.
Step 6: Bake to Perfection
- Preheat your oven to 375°F (190°C).
- Brush the Danishes with egg wash (1 beaten egg with a splash of milk) for a golden, shiny finish.
- Bake for 18–22 minutes, or until golden brown and fragrant.
Step 7: Prepare the Cream Cheese Glaze
- While the Danishes are cooling, mix softened cream cheese (4 oz), powdered sugar (1 cup), milk (2–3 tablespoons), and vanilla extract (½ teaspoon) until smooth and drizzle-ready.
Step 8: Glaze and Serve
- Drizzle the cream cheese glaze generously over the warm Danishes.
- Serve immediately and enjoy their flaky layers, gooey filling, and sweet glaze.
Tips for Success
- Consistency Matters: Roll the dough evenly to ensure all Danishes bake uniformly.
- Prevent Over-Browning: Check the pastries during the final minutes of baking. If they brown too quickly, cover loosely with foil.
- Serve Fresh: Cinnamon Danishes are best enjoyed warm, straight from the oven.
Pro Tips and Variations for Perfect Cinnamon Danish
Making a cinnamon Danish at home is a rewarding experience, and with these tips and creative variations, you can elevate your baking to a whole new level. Whether you’re a beginner or a seasoned baker, these insights will help you achieve bakery-quality results every time.
Pro Tips for Success
- Keep the Dough Cool
- For flaky layers, ensure your dough and butter remain cold throughout the process. Chill the dough if it becomes too soft while rolling.
- Roll Evenly
- Use a rolling pin to ensure the dough is evenly rolled out, which helps the pastries bake consistently.
- Avoid Overfilling
- Spread the cinnamon filling in a thin, even layer, leaving a small border to prevent the filling from oozing out while baking.
- Create the Perfect Swirl
- When rolling the dough into a log, keep it tight to achieve a well-defined cinnamon swirl in each slice.
- Proof Properly
- Let the shaped Danishes proof in a warm spot until they double in size. This procedure creates a soft and fluffy result.
- Use an Egg Wash
- Brushing the Danishes with an egg wash before baking creates a golden, glossy finish that looks irresistible.
- Bake at the Right Temperature
- Preheat the oven to ensure even baking, and avoid opening the door while the Danishes are baking to maintain consistent heat.
Creative Variations
- Add a Nutty Crunch
- Sprinkle chopped pecans or walnuts over the cinnamon filling for added texture and flavor.
- Fruit-Filled Delight
- Add a layer of fruit preserves, such as apricot or raspberry, before spreading the cinnamon mixture for a fruity twist.
- Chocolate Lovers’ Version
- Swap the cinnamon filling for a mixture of chocolate chips and hazelnut spread for an indulgent treat.
- Citrus Twist
- Incorporate orange or lemon zest into the filling or glaze to add a bright, refreshing flavor.
- Savory Danish
- For a unique take, replace the cinnamon filling with a mix of shredded cheese, fresh herbs, and crumbled bacon.
Storage and Freezing Tips
- Storing Leftovers: Keep baked Danishes in an airtight container at room temperature for up to 2 days or refrigerate for up to 5 days.
- Freezing: You can freeze unbaked Danish. After shaping, place them on a baking sheet and freeze until solid. Put the entire prepared package into a freezer bag. Then bake the pie by increasing the total cooking time slightly.

Why These Tips Matter
With these pro tips and variations, you can personalize your cinnamon Danishes to suit your taste while ensuring consistently delicious results. Experiment with the variations or stick to the classic recipe—either way, you’re guaranteed a treat that’s as delightful to make as it is to eat.
Serving Suggestions for The Best Cinnamon Danish Recipe Ever
Your freshly baked cinnamon Danishes are a treat that deserves to be served in style. Here are some serving ideas to enhance your presentation and elevate the experience for your family or guests.
Perfect for Any Occasion
- Breakfast or Brunch Spread
Serve these Danishes as the star of your breakfast table, paired with fresh fruit, yogurt, and a hot cup of coffee or tea. They’re perfect for family gatherings, brunch with friends, or special celebrations. - Afternoon Snack
Enjoy a warm cinnamon Danish as a mid-afternoon pick-me-up with a glass of iced coffee or a frothy cappuccino. It’s the perfect way to recharge. - Dessert Option
For a sweeter touch, top the Danishes with extra cream cheese glaze or a scoop of vanilla ice cream. This transforms them into a decadent dessert that’s hard to resist.
Beverage Pairings
- Coffee and Espresso: The rich, bold flavors of coffee pair beautifully with the sweet, spiced notes of the cinnamon filling.
- Hot Chocolate: For a comforting treat, serve the Danishes with a creamy hot chocolate topped with whipped cream.
- Fresh Juices: Orange juice or apple cider adds a refreshing balance to the buttery richness of the pastries.
Presentation Ideas
- Rustic Charm
Arrange the Danishes on a wooden tray or a tiered cake stand, garnished with a sprinkle of powdered sugar and a few cinnamon sticks for decoration. - Elegant Setup
Place each Danish on individual dessert plates and drizzle with a final touch of cream cheese glaze just before serving. Add a sprig of mint for a sophisticated finish. - Buffet-Style Display
Line up the Danishes on a large platter with small bowls of fruit preserves and extra glaze on the side, allowing guests to customize their pastries.
Storage and Reheating Tips
- Storage: Keep leftover Danishes in an airtight container at room temperature for up to 2 days, or refrigerate for up to 5 days to maintain freshness.
- Reheating: Warm them in a 350°F (175°C) oven for 5–7 minutes to restore their flaky texture. Using a microwave will damage the pastry texture because it releases excess moisture.
Final Thoughts
Cinnamon Danishes are not just a breakfast item—they’re a versatile, crowd-pleasing treat for any time of day. Whether you’re hosting a brunch, enjoying a cozy snack, or serving up a special dessert, these pastries bring a touch of indulgence to any moment.
Conclusion – Why This Cinnamon Danish Recipe is a Must-Try
There’s something undeniably special about homemade cinnamon Danishes. From the warm, buttery layers of flaky pastry to the sweet, spiced filling that melts in your mouth, this recipe is a true labor of love that pays off in every bite.

What sets this recipe apart is its balance of ease and indulgence. With simple ingredients and clear instructions, it’s approachable for beginners yet impressive enough to satisfy seasoned bakers. Plus, the versatility of this recipe allows you to experiment with flavors and toppings to make it uniquely yours.
Imagine serving these beautiful pastries fresh out of the oven—perfectly golden, drizzled with creamy glaze, and paired with a steaming cup of coffee or tea. Whether you’re treating yourself, surprising your family, or wowing guests, this recipe brings bakery-quality Danishes to your kitchen.
So, what are you waiting for? Roll up your sleeves, gather your ingredients, and let the magic of baking fill your home with the comforting aroma of cinnamon. Once you’ve tried this recipe, you’ll never want to settle for store-bought again!
Let me know how these Danishes turn out for you, and feel free to share your own creative variations. Happy baking!

Cinnamon Danish Recipe
Ingredients
For the Dough
- 2 ¾ cups all-purpose flour – The foundation for a soft yet sturdy dough.
- 2 ¼ teaspoons 1 packet instant yeast – Helps the dough rise and creates a light, airy texture.
- ¼ cup granulated sugar – Adds a subtle sweetness to the dough.
- ½ teaspoon salt – Balances the flavors.
- ¾ cup warm milk – Activates the yeast and gives the dough its tender consistency.
- 1 large egg – Provides richness and structure.
- ½ cup unsalted butter softened – Adds the buttery flavor essential for Danish pastry.
For the Cinnamon Filling
- ½ cup unsalted butter softened – Makes the filling creamy and easy to spread.
- ⅔ cup brown sugar – Adds a caramel-like sweetness to the filling.
- 1 ½ tablespoons ground cinnamon – The star of the show giving the filling its warm, spiced flavor.
- 1 teaspoon vanilla extract – Enhances the depth of flavor.
For the Cream Cheese Glaze (Optional but Recommended!)
- 4 oz cream cheese softened – The perfect creamy base for the glaze.
- 1 cup powdered sugar – Adds sweetness and smoothness to the glaze.
- 2 –3 tablespoons milk – Adjusts the consistency for easy drizzling.
- ½ teaspoon vanilla extract – Adds a subtle hint of flavor to the glaze.
Instructions
Step 1: Prepare the Dough
- In a large mixing bowl, combine warm milk (¾ cup), sugar (¼ cup), and instant yeast (2 ¼ teaspoons). Let it sit for 5 minutes until frothy.
- Add egg (1 large), softened butter (½ cup), salt (½ teaspoon), and flour (2 ¾ cups). Mix until a soft dough forms.
- Knead the dough on a lightly floured surface for 8–10 minutes until smooth and elastic.
- Place the dough in a greased bowl, cover, and let it rise in a warm spot for 1–1.5 hours, or until doubled in size.
Step 2: Make the Cinnamon Filling
- In a small bowl, mix softened butter (½ cup), brown sugar (⅔ cup), ground cinnamon (1 ½ tablespoons), and vanilla extract (1 teaspoon) until smooth.
- Set aside at room temperature so it’s easy to spread when assembling.
Step 3: Roll Out the Dough
- Once the dough has risen, punch it down gently and transfer it to a floured surface.
- Roll the dough into a rectangle about 12×16 inches, keeping the thickness even throughout.
Step 4: Spread the Filling and Shape
- Place cinnamon filling across the entire surface of the dough while keeping space free on all sides.
- Begin by rolling up the dough from one end to the other.
- Slice the log into 12 equal pieces using a sharp knife or dental floss for clean cuts.
Step 5: Shape and Proof the Danishes
- Arrange the slices on a greased or parchment-lined baking sheet, leaving space for them to expand.
- Press each piece a little to make it thinner. Cover with a clean towel and let them proof for 30–45 minutes, or until puffed.
Step 6: Bake to Perfection
- Preheat your oven to 375°F (190°C).
- Brush the Danishes with egg wash (1 beaten egg with a splash of milk) for a golden, shiny finish.
- Bake for 18–22 minutes, or until golden brown and fragrant.
Step 7: Prepare the Cream Cheese Glaze
- While the Danishes are cooling, mix softened cream cheese (4 oz), powdered sugar (1 cup), milk (2–3 tablespoons), and vanilla extract (½ teaspoon) until smooth and drizzle-ready.
Step 8: Glaze and Serve
- Drizzle the cream cheese glaze generously over the warm Danishes.
- Serve immediately and enjoy their flaky layers, gooey filling, and sweet glaze.
FAQs – Everything You Need to Know About Cinnamon Danishes
Here are answers to some commonly asked questions to ensure your cinnamon Danish experience is as smooth and enjoyable as possible:
1. Can I make the dough ahead of time?
Absolutely! You can prepare the dough a day in advance. After kneading, let it rise in the refrigerator overnight instead of at room temperature. This slows the fermentation process and enhances the flavor.
2. What’s the best way to keep the Danishes fresh?
Store baked Danishes in an airtight container at room temperature for up to 2 days. If you need to keep them longer, refrigerate them for up to 5 days or freeze them for up to 3 months. Reheat in the oven at 350°F (175°C) for 5–7 minutes to restore their flakiness.
3. Can I use pre-made puff pastry instead of making dough from scratch?
Yes! If you’re short on time or prefer a quicker option, store-bought puff pastry works wonderfully. Follow the same filling and shaping instructions to achieve a similar result.
4. Can I freeze unbaked Danishes?
Definitely. Shape the Danishes, then place them on a parchment-lined baking sheet and freeze until solid. Transfer them to a freezer bag and bake directly from frozen, adding a few extra minutes to the baking time.
5. What if I don’t have cream cheese for the glaze?
No worries! You can make a simple powdered sugar glaze by mixing powdered sugar with milk and a splash of vanilla extract. It’s light, sweet, and pairs beautifully with the cinnamon flavor.
6. How do I prevent the filling from leaking out while baking?
Don’t overfill the Danishes—spread the filling in an even, thin layer and leave a border around the edges.
Make sure the dough is sealed well when rolling or shaping the pastries.
7. Can I customize the filling?
Of course! While the classic cinnamon filling is a favorite, you can experiment with:
Raisins or chopped nuts: Add them to the filling for extra texture.
Fruit preserves: A layer of raspberry or apricot jam pairs wonderfully with the cinnamon flavor.
Chocolate spread: Swap out the cinnamon mixture for Nutella or melted chocolate for a decadent treat.
8. What if I don’t have a stand mixer?
No stand mixer? No problem! You can mix and knead the dough by hand. It’ll take a bit more effort, but the result will be just as rewarding.
9. How do I make mini Danishes for parties?
Simply roll the dough into a rectangle, spread the filling, and roll it into a log as usual. Slice the log into smaller pieces, around 1-inch thick, and bake for a shorter time (about 10–12 minutes). Perfect for bite-sized treats!
Got More Questions?
If there’s anything else you’d like to know, feel free to ask in the comments or share your own tips and tricks. Happy baking!

