There’s something undeniably satisfying about biting into crispy, golden chicken strips paired with perfectly seasoned fries—especially when made fresh at home. If you’ve ever craved restaurant-style chicken tenders but wanted a healthier, budget-friendly alternative, you’re in the right place!
With simple ingredients like juicy chicken breast, a perfectly crunchy breading, and your choice of deep-fried or air-fried perfection, this recipe guarantees irresistible texture and flavor every time. Plus, you can customize the seasoning, choose your favorite dipping sauces, and even swap the fries for a lighter side.
Ready to create the ultimate homemade comfort food that’s just as good—if not better—than takeout? Let’s dive in!
Table of Contents
Key Benefits of Making Chicken Strips and Fries at Home
Why settle for store-bought or fast food when you can create crispy, golden chicken strips and perfectly seasoned fries right in your kitchen? Making them at home comes with several benefits that elevate both flavor and quality.
1. Healthier and Customizable
- Control the ingredients—skip the preservatives and unwanted additives.
- Choose high-quality chicken breast or tenders for a fresher, juicier bite.
- Adjust the seasoning and breading to your taste, whether you love a spicy kick or a classic buttermilk soak for extra tenderness.
2. Crispier, Better-Tasting Breading
- Achieve restaurant-style crunch with panko breadcrumbs or a double-coating method.
- Unlike frozen or fast-food versions, homemade strips stay crispy longer when cooked fresh.
- Choose between deep-frying or air-frying, depending on your preference.
3. Budget-Friendly and Family-Approved
- Making your own chicken tenders and fries is significantly cheaper than ordering takeout.
- Cook larger batches without spending extra—a great option for feeding a crowd.
- A fun, hands-on meal that kids and adults alike will love.
4. Versatile and Dippable
- Serve with honey mustard, ranch, BBQ, or buffalo sauce for the perfect pairing.
- Experiment with sides—swap fries for sweet potato fries, a fresh salad, or coleslaw for variety.
- Great for meal prepping—reheat leftovers in the oven or air fryer for crispy results.
Mastering this homemade comfort food means never having to compromise on flavor, texture, or quality. Ready to get started? Let’s dive into the ingredients!
Ingredients for Homemade Chicken Strips and Fries
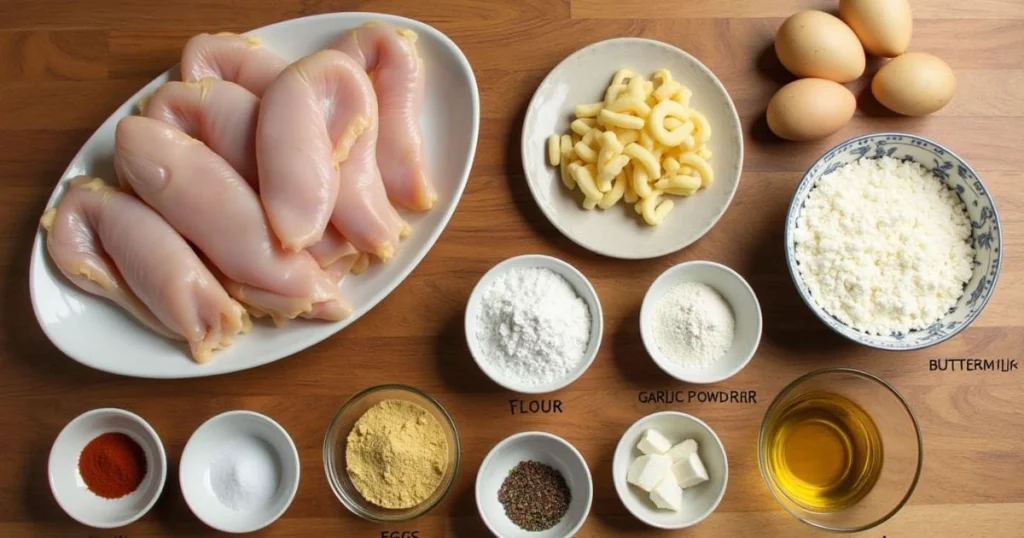
Gathering the right ingredients is the key to achieving crispy, golden chicken strips and perfectly seasoned fries at home. Here’s everything you’ll need for this delicious, restaurant-quality meal.
For the Chicken Strips:
- 1 ½ lbs chicken breast or chicken tenders – Cut into even strips for uniform cooking.
- 1 cup buttermilk – Tenderizes the chicken and helps the breading stick.
- 1 large egg – Adds structure to the coating.
- 1 cup all-purpose flour – Creates a light, crispy texture.
- 1 cup panko breadcrumbs – Ensures extra crunch.
- ½ teaspoon salt – Enhances the natural flavor of the chicken.
- ½ teaspoon black pepper – Adds a subtle kick.
- 1 teaspoon garlic powder – Brings out a savory depth.
- 1 teaspoon onion powder – Complements the garlic for a well-rounded taste.
- 1 teaspoon paprika – Provides a mild smoky flavor and golden color.
- ½ teaspoon cayenne pepper (optional) – For a spicy kick.
- Oil for frying (vegetable, canola, or peanut oil) – Choose an oil with a high smoke point.

For the Homemade Fries:
- 3 large russet potatoes – Ideal for crispy, fluffy fries.
- 2 tablespoons cornstarch – Helps absorb moisture for extra crispiness.
- 2 tablespoons olive oil – Coats the fries for a golden finish.
- ½ teaspoon salt – Essential for seasoning.
- ½ teaspoon black pepper – Enhances flavor.
- ½ teaspoon paprika – Adds subtle smokiness and color.
- ½ teaspoon garlic powder – Infuses a savory touch.
Optional Dipping Sauces:
- Ranch dressing
- Honey mustard
- BBQ sauce
- Buffalo sauce
By using simple, pantry-friendly ingredients, you’ll create crispy, juicy chicken strips and golden, flavorful fries that taste just as good—if not better—than takeout. Ready to cook? Let’s move on to the step-by-step instructions!
Step-by-Step Instructions for Chicken Strips and Fries
Now that we have all the ingredients ready, let’s walk through the process of making crispy, golden chicken strips and perfectly seasoned fries from scratch. Follow these easy steps to achieve restaurant-quality results at home!
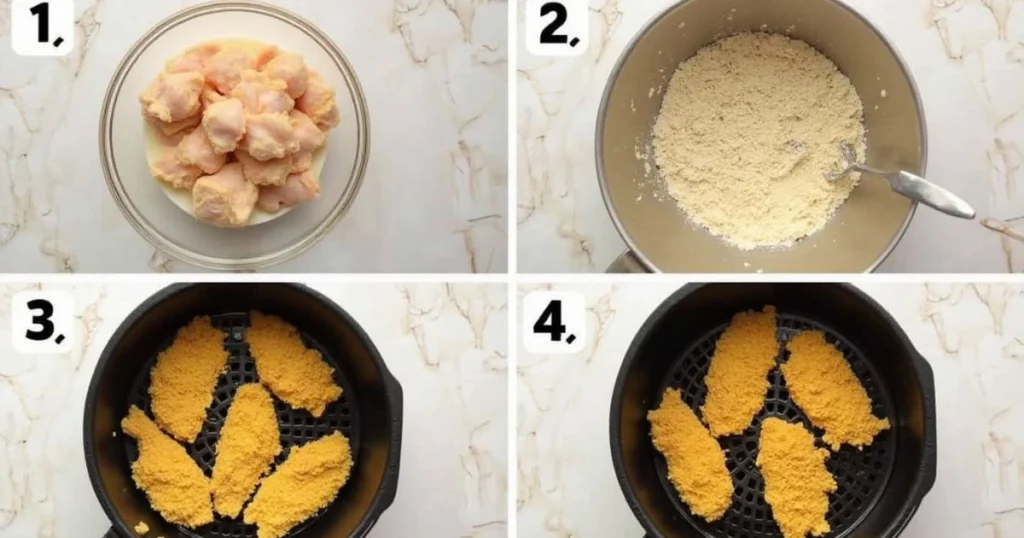
Step 1: Prepare the Chicken
- Slice the chicken – If using whole chicken breasts, cut them into even-sized strips to ensure uniform cooking.
- Marinate – In a bowl, combine the chicken strips with buttermilk, salt, and black pepper. Let it soak for at least 30 minutes (or up to 4 hours for extra tenderness).
Step 2: Prepare the Breading Station
- Set up three bowls:
- Bowl 1: All-purpose flour mixed with garlic powder, onion powder, paprika, and cayenne.
- Bowl 2: A whisked egg combined with a tablespoon of buttermilk.
- Bowl 3: Panko breadcrumbs for a crispy, golden coating.
- Coat the chicken:
- Remove a strip from the buttermilk, letting the excess drip off.
- Dredge it in the seasoned flour, ensuring full coverage.
- Dip it into the egg mixture.
- Fold the breaded piece using gentle pressure to make breadcrumbs stick.
- Repeat until all chicken strips are coated.
Step 3: Fry or Air Fry the Chicken
For Deep Frying:
- Heat the deep pan with a depth of 2-3 inches filled with oil to achieve a temperature of 350°F (175°C).
- Fry the chicken in batches, avoiding overcrowding. Cook for 4-5 minutes, flipping halfway until golden brown and crispy.
- Remove the fries from the oil and place them on paper towel-lined dish to remove extra oil.

For Air Frying:
- Preheat the air fryer to 400°F (200°C).
- Lightly spray the basket with oil and arrange the chicken strips in a single layer.
- Air fry for 10-12 minutes, flipping halfway, until golden and fully cooked.
Step 4: Prepare the Fries
- Cut the potatoes – Slice into even matchsticks or wedges for consistent cooking.
- Soak in cold water – Let the potatoes sit for 30 minutes to remove excess starch, which helps achieve crispier fries.
- Drain and dry thoroughly – Pat the potatoes dry with a clean towel.
- Season – Toss the fries with olive oil, cornstarch, salt, pepper, paprika, and garlic powder for extra flavor.
Step 5: Cook the Fries
For Deep Frying:
- Heat oil in a deep pan to 350°F (175°C).
- Fry in batches for 3-4 minutes, then transfer to a wire rack.
- Increase heat to 375°F (190°C) and fry again for 1-2 minutes for extra crispiness.
For Air Frying or Baking:
- Air Fryer: Preheat to 400°F (200°C) and cook for 15-18 minutes, shaking the basket halfway through.
- Oven-Baked: Spread the fries on a baking sheet and bake at 425°F (220°C) for 30 minutes, flipping halfway.
Step 6: Serve and Enjoy!
- Let the chicken strips rest for a few minutes before serving to lock in moisture.
- Sprinkle the fries with a little extra salt while hot.
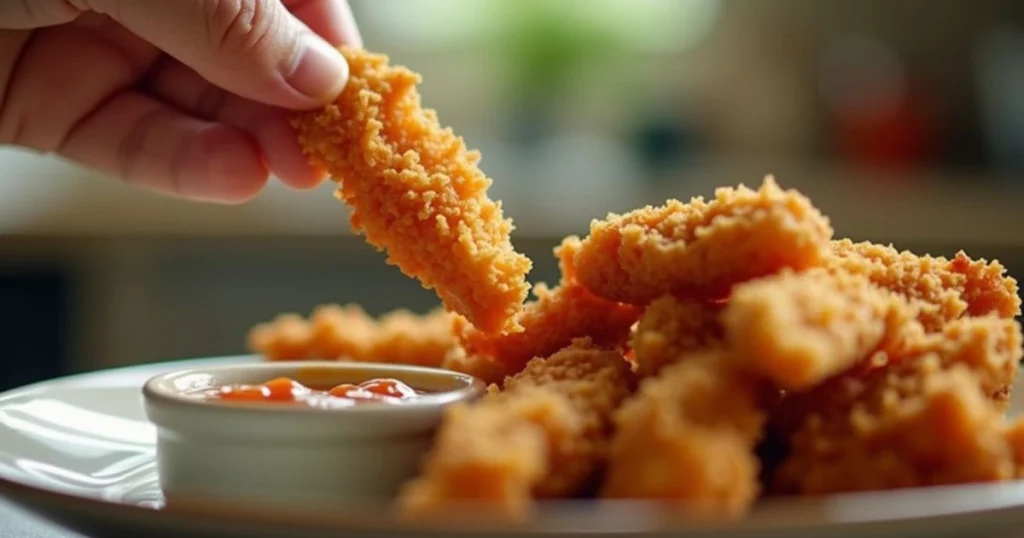
- Your chicken offerings can be served with dipping options including ranch, honey mustard alongside BBQ sauce.
Now, you’re ready to enjoy crispy, juicy chicken strips and perfectly seasoned fries, all made fresh at home!
Essential Equipment for Making Chicken Strips and Fries
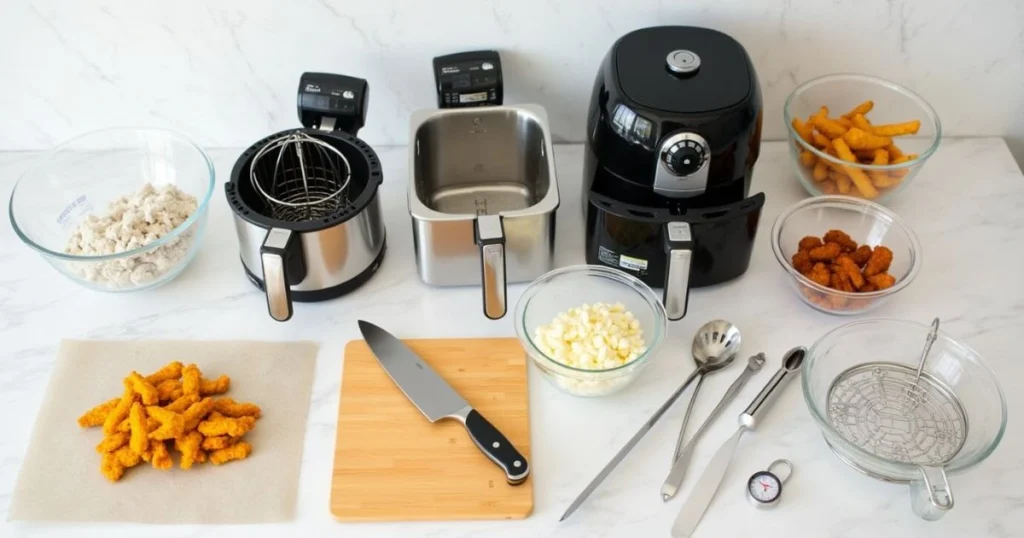
Having the right kitchen tools can make all the difference when preparing crispy, golden chicken strips and perfectly seasoned fries at home. Here’s what you’ll need to ensure smooth preparation and professional-quality results.
1. Cutting Board and Sharp Knife
- A sturdy cutting board and a sharp chef’s knife are essential for slicing chicken into even strips and cutting potatoes into uniform fries.
- Using a sharp knife reduces tearing, helping maintain a clean texture for both the chicken and fries.
2. Mixing Bowls (at least 3)
- You’ll need separate bowls for marinating the chicken, preparing the seasoned flour mixture, and coating the strips.
- Opt for wide, shallow bowls to make dredging easier and less messy.
3. Deep Fryer or Heavy-Duty Pan
- For deep-frying, use a deep fryer, Dutch oven, or heavy-bottomed skillet to maintain consistent oil temperature and ensure even cooking.
- If using a pan, choose one with high sides to prevent oil splatter.
4. Air Fryer or Baking Sheet (Alternative Cooking Methods)
- An air fryer is perfect for achieving crispy results with less oil. Make sure to preheat it and use a single layer for even cooking.
- If baking, use a large, non-stick baking sheet lined with parchment paper or a wire rack for better air circulation.

5. Tongs and Slotted Spoon
- Tongs are essential for safely handling hot chicken strips and flipping them without breaking the crispy coating.
- A slotted spoon helps remove fries from hot oil while draining excess grease.
6. Thermometer (for Oil Temperature Control)
- A kitchen thermometer ensures the oil stays at the ideal frying temperature (350-375°F / 175-190°C) for crispy, golden results.
- If frying at too low a temperature, the coating absorbs too much oil, making it greasy. If too hot, the outside burns before the inside cooks.
7. Paper Towels or Wire Rack
- Draining chicken strips and fries on a wire rack helps keep them crispy.
- If using paper towels, let them rest briefly to absorb excess oil without trapping steam.
With these essential tools, you’ll be fully equipped to make homemade chicken strips and fries like a pro. Now, let’s explore some expert tips and variations to take this dish to the next level!
Pro Tips and Variations for Perfect Chicken Strips and Fries
Making crispy chicken strips and golden fries at home is easier than you think, but a few expert tips can take your recipe from good to great. Whether you’re looking for extra crunch, alternative cooking methods, or creative flavor twists, these insights will help you achieve restaurant-quality results every time.
Pro Tips for the Crispiest Chicken Strips
- Marinate for Maximum Flavor
- Let the chicken soak in buttermilk for at least 30 minutes, but if you have time, 4 hours will make it even more tender.
- Add a teaspoon of hot sauce or Dijon mustard to the marinade for a flavor boost.
- Use a Double-Coating Method
- For extra crispy chicken, dip the strips in the flour mixture twice, returning them to the egg wash in between.
- Press the panko breadcrumbs firmly onto the chicken to ensure a thick, crunchy crust.
- Fry in Batches
- Overcrowding the pan lowers the oil temperature, making the coating soggy.
- Cook in small batches and drain on a wire rack instead of paper towels to maintain crispiness.
- Keep the Chicken Warm While Frying
- If making a large batch, place fried chicken strips on a baking sheet in a 200°F (95°C) oven to keep them warm without losing their crunch.
Pro Tips for Perfectly Crispy Fries
- Soak the Potatoes
- Soaking sliced potatoes in cold water for at least 30 minutes removes excess starch, preventing soggy fries.
- Dry them thoroughly before cooking to prevent oil splattering.
- Use a Two-Step Frying Method
- First fry at 325°F (165°C) for 3-4 minutes to cook the inside.
- Increase heat to 375°F (190°C) and fry again for 1-2 minutes for a crispy exterior.
- Toss in Seasoning While Hot
- For maximum flavor, toss the fries with salt, paprika, and garlic powder as soon as they come out of the fryer or oven.
Recipe Variations to Try
- Spicy Chicken Strips
- Add cayenne pepper or chili powder to the flour mixture for heat.
- Serve with buffalo sauce or spicy mayo for dipping.
- Oven-Baked Chicken Strips
- Coat chicken in olive oil instead of buttermilk for a lighter version.
- Bake at 425°F (220°C) for 20-25 minutes, flipping halfway.
- Air Fryer Fries
- Toss fries in olive oil and cornstarch, then air fry at 400°F (200°C) for 15-18 minutes, shaking the basket halfway through.
- Garlic Parmesan Fries
- Toss hot fries with grated Parmesan, minced garlic, and parsley for a gourmet twist.
- Gluten-Free Chicken Strips
- Swap flour for almond flour or cornstarch, and use gluten-free panko crumbs for a crispy texture.
With these expert tips and fun variations, you can customize chicken strips and fries to suit your taste while ensuring crispy, flavorful results every time. Now, let’s talk about the best ways to serve and enjoy this delicious meal!
Serving Suggestions for Chicken Strips and Fries
Now that you’ve made crispy, golden chicken strips and perfectly seasoned fries, it’s time to serve them up in the most delicious way possible! Whether you’re looking for a classic pairing or a creative twist, these serving ideas will elevate your meal and impress everyone at the table.
1. Classic Dipping Sauces
No chicken strip meal is complete without flavorful dipping sauces! Here are some must-try options:
- Ranch dressing – Creamy, tangy, and a crowd favorite.
- Honey mustard – The perfect balance of sweet and tangy.
- BBQ sauce – Smoky and slightly sweet, great for a bold flavor.
- Buffalo sauce – Spicy and zesty for a fiery kick.
- Garlic aioli – A rich, garlicky dip for an upscale twist.
For variety, serve multiple sauces in small ramekins and let everyone mix and match!
2. Upgrade Your Side Dishes
While fries are the go-to side, you can switch things up with these tasty alternatives:
- Sweet potato fries – A slightly sweet and crispy option.
- Coleslaw – Adds a fresh, crunchy contrast to crispy chicken.
- Mac and cheese – Creamy, cheesy comfort food at its best.
- Steamed veggies – A lighter option for a balanced meal.
- Loaded mashed potatoes – Rich and indulgent with cheese and bacon bits.
Pairing your chicken tenders and fries with the right sides makes the meal feel even more satisfying!
3. Turn It Into a Meal
Looking to serve your crispy chicken strips in a new way? Try these meal ideas:
- Chicken Strip Sandwich – Layer crispy chicken on a toasted brioche bun with lettuce, tomato, and a drizzle of sauce.
- Chicken and Waffles – A Southern-inspired classic with a drizzle of maple syrup.
- Chicken Strip Wrap – Wrap tenders in a flour tortilla with lettuce, cheese, and ranch for a quick lunch.
- Loaded Chicken Fries – Chop up chicken strips and layer them over fries with melted cheese, jalapeños, and ranch drizzle.
These creative serving ideas transform a simple dish into something unforgettable!
4. Perfect for Any Occasion
Homemade chicken strips and fries aren’t just for dinner—they work for so many occasions:
- Game day snacks – Serve a big batch with assorted dips.
- Family dinners – A guaranteed hit with kids and adults alike.
- Party platters – Arrange on a tray with fun dipping sauces for easy entertaining.
- Meal prep – Make extra and reheat for quick, crispy meals throughout the week.
No matter how you serve them, crispy homemade chicken strips and fries always deliver big on flavor and satisfaction. Up next, let’s wrap things up with a quick conclusion on why this recipe is a must-try!
Conclusion: Why You’ll Love This Homemade Chicken Strips and Fries Recipe
Making crispy chicken strips and golden fries at home is easier than you might think—and the results are absolutely worth it! With simple ingredients, foolproof techniques, and the ability to customize flavors, you can create restaurant-quality chicken tenders and fries right in your own kitchen.

By following this recipe, you get:
- Crispy, golden chicken strips with a crunchy, flavorful coating.
- Perfectly seasoned fries that are crispy on the outside and fluffy inside.
- Healthier, homemade versions with no unnecessary additives.
- Endless customization options, from spicy seasoning to unique dipping sauces.
Whether you’re cooking for a family dinner, meal prepping for the week, or whipping up a fun snack for game day, this recipe is a guaranteed crowd-pleaser. Plus, with the option to deep fry, air fry, or bake, you can choose the method that best fits your needs.
Now that you’ve mastered the art of homemade chicken strips and fries, the only question is: Which dipping sauce will you try first? Let us know how your batch turned out and share your favorite variations!
Chicken Strips and Fries
Ingredients
For the Chicken Strips:
- 1 ½ lbs chicken breast or chicken tenders – Cut into even strips for uniform cooking.
- 1 cup buttermilk – Tenderizes the chicken and helps the breading stick.
- 1 large egg – Adds structure to the coating.
- 1 cup all-purpose flour – Creates a light crispy texture.
- 1 cup panko breadcrumbs – Ensures extra crunch.
- ½ teaspoon salt – Enhances the natural flavor of the chicken.
- ½ teaspoon black pepper – Adds a subtle kick.
- 1 teaspoon garlic powder – Brings out a savory depth.
- 1 teaspoon onion powder – Complements the garlic for a well-rounded taste.
- 1 teaspoon paprika – Provides a mild smoky flavor and golden color.
- ½ teaspoon cayenne pepper optional – For a spicy kick.
- Oil for frying vegetable, canola, or peanut oil – Choose an oil with a high smoke point.
For the Homemade Fries:
- 3 large russet potatoes – Ideal for crispy fluffy fries.
- 2 tablespoons cornstarch – Helps absorb moisture for extra crispiness.
- 2 tablespoons olive oil – Coats the fries for a golden finish.
- ½ teaspoon salt – Essential for seasoning.
- ½ teaspoon black pepper – Enhances flavor.
- ½ teaspoon paprika – Adds subtle smokiness and color.
- ½ teaspoon garlic powder – Infuses a savory touch.
Optional Dipping Sauces:
- Ranch dressing
- Honey mustard
- BBQ sauce
- Buffalo sauce
Instructions
Step 1: Prepare the Chicken
- Slice the chicken – If using whole chicken breasts, cut them into even-sized strips to ensure uniform cooking.
- Marinate – In a bowl, combine the chicken strips with buttermilk, salt, and black pepper. Let it soak for at least 30 minutes (or up to 4 hours for extra tenderness).
Step 2: Prepare the Breading Station
- Set up three bowls:
- Bowl 1: All-purpose flour mixed with garlic powder, onion powder, paprika, and cayenne.
- Bowl 2: A whisked egg combined with a tablespoon of buttermilk.
- Bowl 3: Panko breadcrumbs for a crispy, golden coating.
- Coat the chicken:
- Remove a strip from the buttermilk, letting the excess drip off.
- Dredge it in the seasoned flour, ensuring full coverage.
- Dip it into the egg mixture.
- Fold the breaded piece using gentle pressure to make breadcrumbs stick.
- Repeat until all chicken strips are coated.
Step 3: Fry or Air Fry the Chicken
- For Deep Frying:
- Heat the deep pan with a depth of 2-3 inches filled with oil to achieve a temperature of 350°F (175°C).
- Fry the chicken in batches, avoiding overcrowding. Cook for 4-5 minutes, flipping halfway until golden brown and crispy.
- Remove the fries from the oil and place them on paper towel-lined dish to remove extra oil.
- For Air Frying:
- Preheat the air fryer to 400°F (200°C).
- Lightly spray the basket with oil and arrange the chicken strips in a single layer.
- Air fry for 10-12 minutes, flipping halfway, until golden and fully cooked.
Step 4: Prepare the Fries
- Cut the potatoes – Slice into even matchsticks or wedges for consistent cooking.
- Soak in cold water – Let the potatoes sit for 30 minutes to remove excess starch, which helps achieve crispier fries.
- Drain and dry thoroughly – Pat the potatoes dry with a clean towel.
- Season – Toss the fries with olive oil, cornstarch, salt, pepper, paprika, and garlic powder for extra flavor.
Step 5: Cook the Fries
- For Deep Frying:
- Heat oil in a deep pan to 350°F (175°C).
- Fry in batches for 3-4 minutes, then transfer to a wire rack.
- Increase heat to 375°F (190°C) and fry again for 1-2 minutes for extra crispiness.
- For Air Frying or Baking:
- Air Fryer: Preheat to 400°F (200°C) and cook for 15-18 minutes, shaking the basket halfway through.
- Oven-Baked: Spread the fries on a baking sheet and bake at 425°F (220°C) for 30 minutes, flipping halfway.
Step 6: Serve and Enjoy!
- Let the chicken strips rest for a few minutes before serving to lock in moisture.
- Sprinkle the fries with a little extra salt while hot.
- Your chicken offerings can be served with dipping options including ranch, honey mustard alongside BBQ sauce.
FAQs: Your Top Questions About Homemade Chicken Strips and Fries
Got questions? Here are the answers to some common concerns about making crispy chicken strips and golden fries at home.
1. How do I make my chicken strips extra crispy?
For the crispiest coating:
- Use panko breadcrumbs instead of regular breadcrumbs.
- Try a double-dredge method—coat in flour, dip in egg, then return to the flour before frying.
- Make sure the oil is hot (350-375°F/175-190°C) before frying.
- Drain on a wire rack instead of paper towels to prevent sogginess.
2. Can I bake or air-fry the chicken instead of deep-frying?
Yes! Here’s how:
- Air Fryer: Preheat to 400°F (200°C) and cook for 10-12 minutes, flipping halfway.
- Oven-Baked: Place on a greased baking sheet and bake at 425°F (220°C) for 20-25 minutes, flipping halfway through.
Both methods give a crispy coating with less oil.
3. How do I keep my fries from getting soggy?
For extra crispy fries:
- Soak cut potatoes in cold water for 30 minutes to remove excess starch.
- Pat them completely dry before cooking.
- Toss in a little cornstarch before air-frying or baking.
- Fry twice—once at 325°F (165°C) to cook inside, then at 375°F (190°C) for a crispy exterior.
4. What’s the best way to reheat chicken strips and fries?
To keep them crispy:
- Oven: Bake at 375°F (190°C) for 8-10 minutes.
- Air Fryer: Heat at 350°F (175°C) for 4-5 minutes.
- Avoid the microwave—it makes the coating soggy.
5. Can I make chicken strips ahead of time?
Yes! Here’s how:
- Prep ahead: Coat the chicken and store it in the fridge for up to 24 hours before frying.
- Freeze before cooking: Lay breaded chicken on a baking sheet, freeze until solid, then transfer to a freezer bag.
- Cook from frozen: Add an extra 2-3 minutes to the frying or air-frying time.
6. What dipping sauces pair best with chicken strips?
Some tasty options include:
- Ranch dressing – Classic and creamy.
- Honey mustard – Sweet and tangy.
- BBQ sauce – Smoky and bold.
- Buffalo sauce – Spicy with a kick.
- Garlic aioli – A rich, garlicky upgrade.
Now that you have all the tips and tricks, you’re ready to make the best homemade chicken strips and fries anytime. If you have any other questions, drop them in the comments—we’d love to help!

