There’s something incredibly satisfying about making your own chicken jerky at home. Whether you’re looking for a high-protein snack, a healthy alternative to store-bought jerky, or just love experimenting in the kitchen, this recipe has you covered. Unlike commercial versions that often contain preservatives and excess sodium, homemade chicken jerky lets you control the ingredients while maximizing flavor.
The best part? You don’t need fancy equipment—just a dehydrator or an oven. With the right marinade and a little patience, you’ll create tender, flavorful jerky that’s perfect for on-the-go snacking, hiking trips, or post-workout fuel.
In this guide, I’ll walk you through step-by-step instructions to achieve the perfect texture and taste, along with expert tips for variations and storage. Get ready to transform simple chicken into a savory, protein-packed treat that’s easy, delicious, and completely customizable!
Table of Contents
Key Benefits of Homemade Chicken Jerky
Making chicken jerky at home comes with a variety of benefits, from health advantages to cost savings and customizable flavors. Here’s why you’ll love this homemade version:
1. Healthier Alternative to Store-Bought Jerky
Many commercial jerkies contain preservatives, excessive sodium, and artificial additives. When you make it yourself, you control the ingredients, ensuring a lean, high-protein, and low-fat snack without unwanted chemicals.
2. Packed with Protein & Perfect for Any Diet
Chicken jerky is an excellent protein-packed snack that fuels your body while being low in fat and carbs. It’s ideal for keto, paleo, and high-protein diets, making it a great choice for fitness enthusiasts, hikers, and busy individuals.
3. Budget-Friendly & Long-Lasting
Store-bought jerky can be expensive, but making it at home is far more affordable. Plus, properly dehydrated chicken jerky has a long shelf life, making it a great snack to prepare in bulk.
4. Fully Customizable Flavors
One of the biggest perks of making your own jerky is that you can customize the seasonings and marinades to match your taste. Whether you love a smoky barbecue, spicy kick, or a simple garlic-herb blend, the possibilities are endless.
5. Easy to Make with Minimal Equipment
You don’t need any fancy tools—just a dehydrator or an oven to get the job done. The process is simple: marinate, dry, and enjoy!
Homemade chicken jerky is not only delicious and nutritious, but it also gives you complete control over the quality and flavor. Now that you know why it’s worth making, let’s dive into the ingredients and steps to create your perfect batch!
Ingredients for Homemade Chicken Jerky
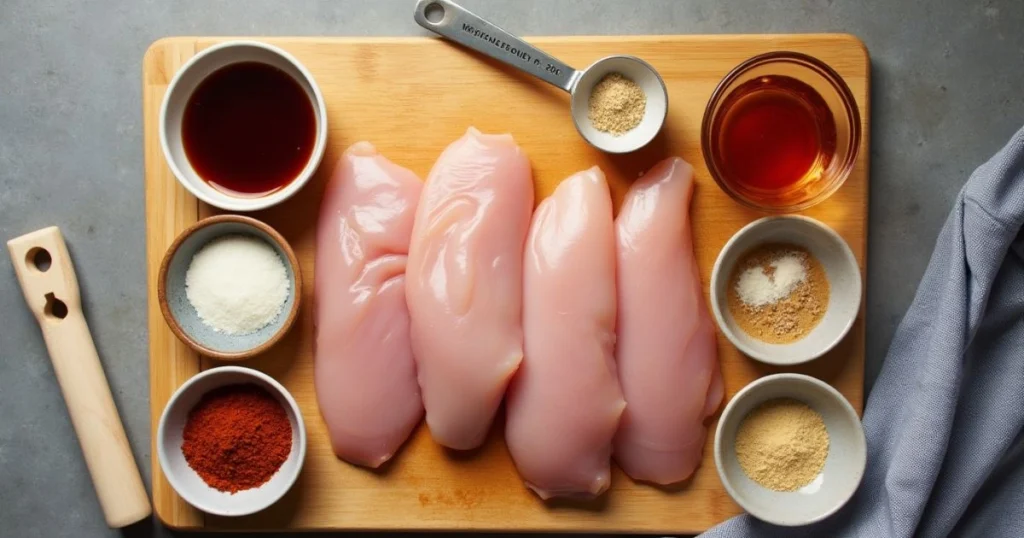
To create flavorful, tender chicken jerky, you need just a few simple ingredients that work together to enhance taste and texture. This recipe allows for customization, so feel free to tweak the seasonings to match your preference!

Main Ingredients:
- 2 lbs boneless, skinless chicken breast (thinly sliced for even drying)
- ½ cup low-sodium soy sauce (for a rich, umami flavor)
- 2 tbsp Worcestershire sauce (adds depth and tang)
- 1 tbsp honey or maple syrup (for a hint of natural sweetness)
- 1 tsp smoked paprika (adds a subtle smoky kick)
- 1 tsp garlic powder (for extra savoriness)
- 1 tsp onion powder (enhances overall flavor)
- ½ tsp black pepper (for a mild spice)
- ½ tsp red pepper flakes (optional, for heat)
Flavor Variations:
Want to switch things up? Try these alternative marinade ideas:
- Teriyaki Style – Add 1 tbsp of sesame oil and 1 tsp ginger powder.
- Spicy Kick – Increase red pepper flakes and add 1 tsp cayenne pepper.
- Lemon Herb – Swap soy sauce for lemon juice and add dried thyme and rosemary.
Why These Ingredients Work:
Each ingredient plays a role in ensuring your jerky stays flavorful, tender, and well-balanced. The soy sauce and Worcestershire sauce add richness and depth, while the honey helps with caramelization and texture. Spices bring out bold flavors without overpowering the natural taste of the chicken.
With your ingredients prepped, it’s time to dive into the step-by-step process of making the best homemade chicken jerky!
Step-by-Step Instructions: How to Make Chicken Jerky
Making homemade chicken jerky is easier than you think! Follow these simple steps to achieve perfectly tender, flavorful jerky every time.
1. Prepare the Chicken
- Start with boneless, skinless chicken breast for lean and tender jerky.
- Place the chicken in the freezer for 30–45 minutes—this makes slicing easier.
- Using a sharp knife, slice the chicken into ¼-inch thick strips. Cutting against the grain results in a softer texture, while slicing with the grain creates a chewier jerky.
2. Marinate for Maximum Flavor
- In a large mixing bowl, whisk together the soy sauce, Worcestershire sauce, honey, garlic powder, onion powder, smoked paprika, black pepper, and red pepper flakes.
- Place the chicken strips inside the marinade so they become fully covered with the mixture.
- Place the mixture in the refrigerator with a cover for at least six hours while allowing it to ripen during the overnight period. Time in the refrigerator enables contents to deeply permeate throughout the meat.
3. Prepare for Drying
- Dry the chicken pieces with paper towels while removing them from their marinade. Drying the chicken with paper towels helps to achieve well-distributed dehydration while minimizing moisture content.
- Arrange the chicken strips in a single layer on a dehydrator tray or a wire rack over a baking sheet if using an oven. Ensure the pieces aren’t overlapping to promote even drying.

4. Dehydrate the Chicken
- Using a Dehydrator:
- Set the dehydrator to 160°F (71°C).
- Let the chicken dry for 4–6 hours, flipping halfway through.
- Using an Oven:
- Preheat the oven to 170°F (or the lowest setting).
- Place the tray in the oven and prop the door open slightly to allow moisture to escape.
- Bake for 3–4 hours, flipping the strips halfway.
5. Check for Doneness
- The jerky is ready when it’s firm, dry, but still slightly pliable—it should not snap when bent.
- Let it cool for 15–20 minutes before storing.
6. Store for Long-Lasting Freshness
- Place the mixture in airtight storage at room temperature for a period of two weeks.
- For longer shelf life, refrigerate for up to 1 month or freeze for 3–6 months.
Now you have homemade chicken jerky that’s flavorful, protein-packed, and free of preservatives—perfect for snacking anytime, anywhere!
Essential Equipment for Making Chicken Jerky
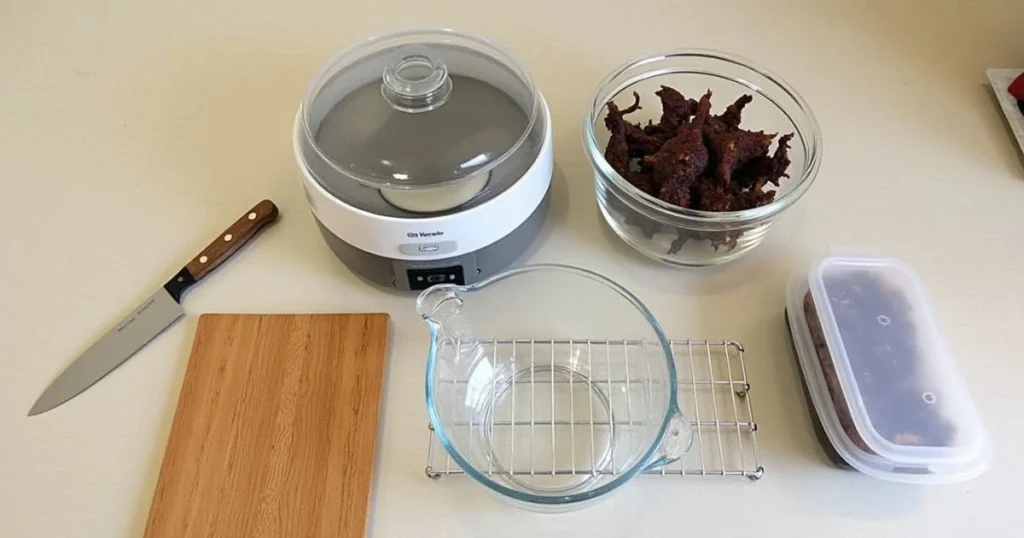
Making homemade chicken jerky doesn’t require a professional kitchen—just a few essential tools to ensure even drying and maximum flavor. Here’s what you’ll need:
1. Sharp Knife or Meat Slicer
- A sharp knife is crucial for cutting thin, uniform slices of chicken.
- If you plan to make jerky often, a meat slicer can save time and ensure consistent thickness for even drying.
2. Cutting Board
- Use a sturdy cutting board to safely slice your chicken.
- Opt for a separate board for raw poultry to maintain food safety and prevent cross-contamination.
3. Mixing Bowls
- A large mixing bowl is needed to prepare and marinate the chicken.
- Using glass or stainless steel bowls is best, as they won’t absorb flavors or stains.
4. Dehydrator (Recommended for Best Results)
- A food dehydrator is the easiest and most effective tool for making jerky.
- It maintains a consistent low temperature (around 160°F/71°C), ensuring slow and even drying without overcooking.
5. Oven (Alternative Method)
- If you don’t have a dehydrator, an oven works just as well.
- Set it to the lowest temperature (170°F or lower) and keep the door slightly open to allow moisture to escape.
- Place the chicken on a wire rack over a baking sheet to ensure proper air circulation.
6. Paper Towels or Clean Kitchen Towels
- After marinating, patting the chicken dry with paper towels prevents excess moisture, allowing for faster and more even drying.
7. Airtight Containers for Storage
- Once the jerky is ready, store it in an airtight container or resealable bags to maintain freshness.
- Vacuum-sealed bags are ideal for long-term storage, helping the jerky last up to 6 months in the freezer.
Optional But Useful Tools:
- Meat Thermometer – Ensures the internal temperature of the chicken reaches 165°F (74°C) for food safety.
- Marinade Injector – If you want extra flavor infusion, this tool helps distribute marinade evenly.
- Cooling Rack – Allows airflow around the jerky while it cools, preventing sogginess.

By using the right equipment, you’ll ensure your homemade chicken jerky turns out perfectly dried, flavorful, and safe to eat every time!
Pro Tips and Variations for the Best Chicken Jerky
Want to take your homemade chicken jerky to the next level? These expert tips and creative variations will help you customize flavors, improve texture, and achieve the perfect batch every time.
Pro Tips for Perfect Chicken Jerky
Slice Evenly for Consistent Drying
- Cutting the chicken into ¼-inch thick strips ensures even drying.
- Partially freezing the chicken for 30–45 minutes makes slicing easier.
Marinate for Maximum Flavor
- Let the chicken marinate for at least 6 hours, but overnight is best for deeper flavor penetration.
- Pat the strips dry before dehydrating to prevent excess moisture.
Use a Dehydrator for Best Results
- A food dehydrator provides consistent heat and airflow, creating evenly dried, chewy jerky.
- If using an oven, prop the door open slightly to allow moisture to escape.
Test for Doneness
- The jerky should be firm, slightly pliable, and not snap when bent.
- To be food-safe, the chicken must reach 165°F (74°C) internally before dehydrating.
Store Properly for Freshness
- Keep jerky in an airtight container or vacuum-sealed bag to prevent moisture absorption.
- Room temperature: Lasts up to 2 weeks.
- Refrigerated: Lasts up to 1 month.
- Frozen: Can be stored for 3–6 months for long-term freshness.
Flavor Variations to Try
Spicy Sriracha Chicken Jerky
- Add 1 tbsp sriracha and 1 tsp cayenne pepper for a fiery kick.
Sweet & Smoky Honey Mustard
- Swap Worcestershire sauce for Dijon mustard and add 1 tbsp honey for a tangy-sweet balance.
Lemon Herb Garlic
- Use fresh lemon juice instead of soy sauce and season with thyme, oregano, and rosemary.
Teriyaki-Style Chicken Jerky
- Replace Worcestershire sauce with pineapple juice and sesame oil for a hint of sweetness and umami.
These pro tips and flavor variations will help you create a customized, delicious, and perfectly dried batch of chicken jerky every time. Experiment with different seasonings and enjoy your homemade protein-packed snack just the way you like it!
Serving Suggestions for Homemade Chicken Jerky
Homemade chicken jerky is a versatile, protein-packed snack that can be enjoyed in many ways. Whether you’re looking for a quick energy boost or a creative way to incorporate it into meals, here are some delicious serving ideas.
Enjoy It as a Standalone Snack
- Perfect for on-the-go snacking, road trips, or hiking adventures.
- A great post-workout protein boost to keep you energized.
- Pair it with nuts, dried fruit, or cheese for a balanced snack mix.
Use It in Savory Dishes
- Chop it into bite-sized pieces and toss it into salads for an extra punch of flavor and protein.
- Rehydrate small pieces in soups, stews, or stir-fries to add depth and texture.
- Crumble it over omelets, scrambled eggs, or grain bowls for a smoky, savory twist.
Pair It with Dips and Spreads
- Serve alongside hummus, guacamole, or Greek yogurt dips for a satisfying snack.
- Enjoy with hot mustard, honey barbecue, or ranch dressing for added flavor.
Incorporate It into Travel-Friendly Meals
- Add it to sandwiches or wraps for a chewy, savory bite.
- Mix it into instant ramen or backpacking meals for a quick protein source.
- Pack it in lunchboxes as a healthier alternative to processed snacks.
Best Drink Pairings
- Enjoy with herbal tea, lemon water, or a refreshing smoothie for a balanced snack.
- Pairs well with light beers, kombucha, or spiced tomato juice for a flavorful contrast.
Homemade chicken jerky isn’t just a snack—it’s a versatile ingredient that can enhance meals, travel well, and keep you fueled throughout the day. Get creative with how you enjoy it and discover your favorite way to serve this delicious, protein-packed treat!
Conclusion
Making homemade chicken jerky is easier than you might think, and the rewards are well worth the effort. With just a few simple ingredients, a bit of patience, and the right drying method, you can create a savory, protein-packed snack that’s healthier and more flavorful than store-bought options.

By controlling the ingredients, you avoid preservatives, excess sodium, and artificial additives, ensuring a clean and nutritious treat. Whether you prefer your jerky mild, smoky, spicy, or sweet, you can tailor the flavors to match your taste. Plus, with proper storage, your jerky will stay fresh and ready for whenever you need a satisfying snack.
Now that you know how to make the best chicken jerky at home, why not experiment with different marinades and techniques? Whether you enjoy it on its own, paired with dips, or as part of a meal, this homemade version is sure to become a favorite.
Try this recipe, share it with family and friends, and enjoy a healthy, homemade snack that’s packed with flavor and nutrition!

Chicken Jerky
Ingredients
Main Ingredients:
- 2 lbs boneless skinless chicken breast (thinly sliced for even drying)
- ½ cup low-sodium soy sauce for a rich, umami flavor
- 2 tbsp Worcestershire sauce adds depth and tang
- 1 tbsp honey or maple syrup for a hint of natural sweetness
- 1 tsp smoked paprika adds a subtle smoky kick
- 1 tsp garlic powder for extra savoriness
- 1 tsp onion powder enhances overall flavor
- ½ tsp black pepper for a mild spice
- ½ tsp red pepper flakes optional, for heat
Flavor Variations:
- Want to switch things up? Try these alternative marinade ideas:
- Teriyaki Style – Add 1 tbsp of sesame oil and 1 tsp ginger powder.
- Spicy Kick – Increase red pepper flakes and add 1 tsp cayenne pepper.
- Lemon Herb – Swap soy sauce for lemon juice and add dried thyme and rosemary.
Instructions
Prepare the Chicken
- Start with boneless, skinless chicken breast for lean and tender jerky.
- Place the chicken in the freezer for 30–45 minutes—this makes slicing easier.
- Using a sharp knife, slice the chicken into ¼-inch thick strips. Cutting against the grain results in a softer texture, while slicing with the grain creates a chewier jerky.
Marinate for Maximum Flavor
- In a large mixing bowl, whisk together the soy sauce, Worcestershire sauce, honey, garlic powder, onion powder, smoked paprika, black pepper, and red pepper flakes.
- Add the chicken strips to the marinade, ensuring each piece is well-coated.
- Cover and refrigerate for at least 6 hours, preferably overnight. This allows the flavors to fully infuse into the meat.
Prepare for Drying
- Remove the chicken from the marinade and pat dry with paper towels. This helps achieve even dehydration and prevents excess moisture.
- Arrange the chicken strips in a single layer on a dehydrator tray or a wire rack over a baking sheet if using an oven. Ensure the pieces aren’t overlapping to promote even drying.
Dehydrate the Chicken
- Using a Dehydrator:
- Set the dehydrator to 160°F (71°C).
- Let the chicken dry for 4–6 hours, flipping halfway through.
- Using an Oven:
- Preheat the oven to 170°F (or the lowest setting).
- Place the tray in the oven and prop the door open slightly to allow moisture to escape.
- Bake for 3–4 hours, flipping the strips halfway.
Check for Doneness
- The jerky is ready when it’s firm, dry, but still slightly pliable—it should not snap when bent.
- Let it cool for 15–20 minutes before storing.
Store for Long-Lasting Freshness
- Store in an airtight container at room temperature for up to 2 weeks.
- For longer shelf life, refrigerate for up to 1 month or freeze for 3–6 months
FAQs About Homemade Chicken Jerky
1. How long does homemade chicken jerky last?
Properly stored chicken jerky lasts up to 2 weeks at room temperature, up to a month in the refrigerator, and 3–6 months in the freezer. For the longest shelf life, store it in an airtight container or vacuum-sealed bag.
2. Do I need a dehydrator to make chicken jerky?
No, a dehydrator is the best method, but you can also use an oven set at the lowest temperature with the door slightly open to allow moisture to escape. Both methods work well for achieving a chewy texture.
3. How do I know when the jerky is done?
The jerky is ready when it feels firm, dry, and slightly pliable. It shouldn’t be soft or sticky but also shouldn’t snap when bent.
4. Can I make chicken jerky without soy sauce?
Yes! You can substitute soy sauce with coconut aminos, tamari, or liquid aminos for a gluten-free and lower-sodium option.
5. Is homemade chicken jerky safe to eat?
Yes, as long as the chicken reaches an internal temperature of 165°F (74°C) before dehydrating. This ensures the jerky is safe to consume.
6. Can I marinate the chicken for too long?
Marinating for 6–12 hours is ideal. More than 24 hours can break down the texture too much, making it mushy rather than chewy.
7. Why is my jerky too tough?
If your jerky turns out too tough, it may have been sliced too thick, overdried, or cut with the grain. For a more tender texture, slice against the grain and check for doneness periodically while drying.
8. Can I use other meats for this recipe?
Absolutely! This recipe works well with turkey, beef, or even fish. Just adjust drying times based on the type and thickness of the meat.
Homemade chicken jerky is a fun, delicious, and healthy snack that’s easy to make and customize. If you have more questions, drop them in the comments, and I’ll be happy to help!

